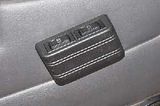
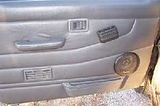
I just finished an install of a Colibri' aftermarket power window kit. A great addition to my 1995 HB that makes the hours I spend in it that much more user friendly.
1- Colibri's Master aftermarket window power kit - $65 (included shipping) purchased on Ebay. 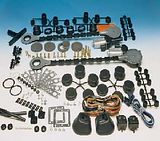
1- 30 amp relay - $25 (included shipping) Purchased at www.A1electric.com (which also sells the kits but much more expensive than they can be had on Ebay but Ebay sellers don't offer a warranty). Part number RELAY1. Next time I would make my own from parts purchased at my local autoparts store. Would cost about $15. 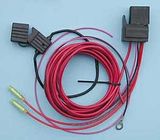
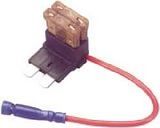
1- Add-A-Circuit - $15 purchased at my local Napa made by LittelFuse part number FHA200BP. A super easy way to provide the on ignition power to trip the relay.
– Lots of wire ties.
- Time - 7 hours. It takes a lot of time to route the wires especially on the passenger side as the blower and blower housing must be removed to gain access to the door jamb grommet.
– Skill level required – Moderate. This is a time consuming install and patience is a must.
– Tools – Drill, 7/64" bit, 7/16" bit, putty knife, electrical pliers, knife, socket wrench, 10mm and 12mm sockets, straight and Phillips screwdrivers.
Step 1 – Remove the key from the ignition so you don't have to listen to that dinging during the whole install and turn off your interior light. Yeah, I know you want to listen to the stereo during the install but it will take so long to do this you will run down the battery. Start with the passenger side that way if you run out of time you won't have the harness laying in the driver's side floor board. Remove the glove box by opening it and pushing the plugs located in the rear top of the box into the box. This will allow the box to open all the way to access the two screws holding it to the dash. (sorry, no pic of this).
Step 2 - Remove the panel behind the glove box by removing the six screws that hold it in place (sorry, no pic of this).
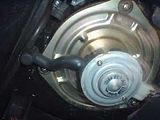
Step 3 - Remove the three screws that hold the blower in place. Remove the blower, disconnecting the wire harness and the drain hose.
Step 4 – Remove the lower side kick panel by removing the screw. The panel is held on with a push clip at the top that you cannot see. Pry the panel away so that you can see behind it, locate the clip and with a screw driver push on it to release it (sorry, no pic or this).
Step 5 – Remove the two nuts (top) and one bolt (bottom) that hold the blower housing in place and remove it. This is a tight fit but with a little pressure on the outside edge of the dash it will come out (sorry, no pic of this). In the pic of the blower removal you can see the seal that is between the blower housing and the coil box. This is just a face fit to the blower box so you just have to slide it past this seal. Try not to damage the seal. Crap, it won't come out of the truck all the way because of this wire thing that controls the door in it! Pop the wire tie that holds it to the vent tunnel at the top of the dash so you can get it out of your way laying it in the center of the cabin.
Step 6 – Time to remove the door panel. Remove the two screws that hold on the armrest.
Step 7 – Remove the door lock puller by unscrewing it.
Step 8 – Remove the window crank by using a thin, flat object like a putty or butter knife. Make sure the window is up! Insert the tool in between the crank and panel and look for the retaining clip that holds it on. Locate the open side of the clip and push on it to pop it off. Remove the window crank (won't need these anymore!).
Step 9 – Using a thin, flat object like a putty or butter knife remove the door handle surround. Start at the bottom and insert the tool between the handle and the surround and pry downward and away from the door. Once loose at the bottom just lift off.
Step 10 – Using a thin, flat object like a putty or butter knife pry the panel away from the door slightly at the bottom rear corner. You can use this object to pop out the Christmas tree clips but it is better if you use something that will go on both sides of the clip so as not to tear it out of the panel hole. They make a tool especially for this that you can buy at your local auto parts store or a pair of long needle nose pliers will do in a pinch but I find that electrical pliers work just as well. Whatever you use make sure it is right up against the edge of the clip. Work your way up the rear of the panel to the top and then along the bottom to the front. To get at the ones running up the front of the door work from the bottom. There is also a row of clips along the top edge of the panel that you have to get at from the bottom. No matter how careful you are some of these will break so stop at your local autoparts store and pic up a package for spares. Yeah, they were expensive, weren't they. Now is also a great time to upgrade those front door speakers and get rid of those ugly speaker covers. 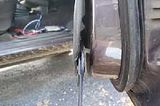
Step 11 – Now you can gain access to the door jamb grommet to pass the wire from the cabin into the door. It is almost impossible to pass the wires through the same hole as the other ones go through so it is easiest just to cut a small slit in the grommet to pass the window wires through. Pass the window wires through the slit and pull out enough wire to get to the rear of the door. Make sure that the wire cover is in position, held on place by the grommet with the rest available for the routing to the door grommet.
Step 12 – You must remove the door grommet so that you can pull enough wire through so that you can get the length right that will remain in the door jamb. Make a slit in the grommet and pass the wire through pulling the excess until it matches the factory wire routing in the jamb. Wire tie the two wires together. Feed the wire into the door and reinstall the grommet.
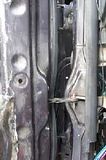
Step 13 – Pull the motor power wires out of the rear bottom access hole of the door. Now you understand why the wire connector bodies were not preinstalled onto the wires. There would have been no way to pass them through the door jamb grommets. Locate the switch wires inside of the door and feed them out through the hole in the bottom middle of the door. Install the connector body to the wire harness matching the wires from the switch harness. Connect the main wire harness to the switch wire harness and feed it back into the door. Run the wire up and pull the switch wires out of the hole directly under the window crank.
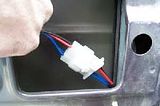
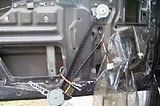
Step 14 – Install the crank adapter and cog to the window crank rod making sure to line up the blank ribbed area of the adapter and cog. Install the screw so that the adapter and cog won't come apart and are tightly fitted together. (See cog pic step 17)
Step 15 – Press fit the cog end (metal side out) of the window motor assembly to the crank and rotate the motor into position of the large opening at the rear of the door. Determine where you need to attach the mounting brackets to the motor for a positive attachment. Mark the holes on the motor you need to attach the mounting brackets to. Remove the motor assembly and attach the mounting brackets. Put the motor back into position and mark the holes to mount the assembly to the door. Remove the assembly and drill 7/64" holes. Insert the grommets and bushings into the mounting brackets and screw to door.
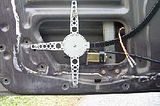
Step 16 – Plug the harness into the motor.
Step 17 – If you need to, remove the cog end of the motor assembly and reinstall for best routing. Determine where you need to attach the mounting brackets to the cog end for a positive attachment. Mark the holes on the cog end you need to attach the mounting brackets to. Remove the cog end and attach the mounting brackets. Put the end into position and mark the holes to mount it to the door. Remove the cog end and drill 7/64" holes. Insert the grommets and bushings into the mounting brackets reinstall cog end and screw to door. Install snap ring on window crank adapter.
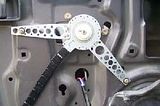
Step 18 – Pull the switch wire harness connectors out of the crank hole in the plastic and reinstall the rest of the plastic.
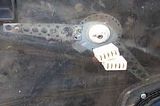
Step 19 – Now is the time to get rid of the butt freezer option installed on all hardbodys. Notice in the pic of the plastic over the motor the slits to let air pass into the cabin. They are supposed to make closing the doors easier by allowing pressure to escape. All they do is freeze your butt off when you crack the window in the winter. Take some tape and cover the slits.
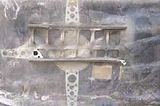
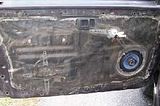
Step 20 – Route the wire harness over the lower blower housing mounting location and push it behind the center column to exit in the driver's floorboard
Step 21 – Reinstall the blower housing. To keep the seal between it and the coil in location reach inside the housing as you install it and hold the seal in location. Route the wire that controls the blower housing door back along the vent tunnel.
Step 22 – Reinstall the lower side kick panel.
Step 23 – Reinstall the blower remembering to reconnect the harness and drain hose.
Step 24 – Reinstall the panel behind the glove box.
Step 25 – Reinstall the glove box.
Step 26 – Have a beer, you've worked really hard. Run out of time? Feed the window switch wire connectors back into the door, snap the door panel back on and finish another day. Pull the wire harness out of the driver's floorboard and route it in front of the center column and let your passengers deal with it until you finish the job. Sorry you can't roll down the window yet and I hope it wasn't rolled down when you started (remember the warning in step 8?) or you might get a little wet, cold or hot depending on the weather.
Step 27 – Ready for some more wire harness routing? It's not as bad on the driver's side (but not by much). Remove the lower side kick panel as in step 4.
Step 28 – Remove the two screws that hold the knee kick panel under the steering wheel in place.
Step 29 – Remove the cover for the park brake rod if dash mounted.
Step 30 – Remove the knee kick panel.
Step 31 – Unbolt the fuse block so you can get to the door jamb grommet.
Step 32 - Route the wire harness over the park brake (if dash mounted) and tie strap it up against the fire wall using the park brake rod as an anchor so that it doesn't get caught in park brake.
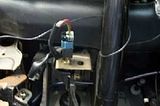
Step 33 – Route the harness through the holes in each side of the steer column mounting bracket.
Step 34 – Route the wire harness over the fuse block harness.
Step 35 – Repeat steps 6 through 19.
Step 36 – Wrap up any excess harness and wire tie above the fuse block.
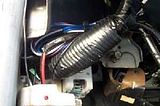
Step 37 – Time to get power to this setup. This step is done from inside the vehicle. Remove the steer column wire wall cover. Drill a hole 7/16" through the fire wall below and to the right of the steer column.
Step 38 – Insert one of the extra rubber grommets that came with the window kit into the hole so that your power wire doesn't get worn and short out.
Step 39 – From the left hand side of the steer column route the relay main power wire back along the path of the window harness but just through the left hand hole in the steer column mounting bracket. Wire tie the wire to the steer column.
Step 40 – From inside the vehicle feed the relay main power wire out of the hole into the engine compartment.
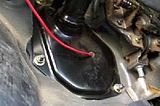
Step 41 – In the engine compartment Route the main power wire up to the AC and heater tubes running across the compartment. Wire tie the wire to the tubes and run to the passenger side.
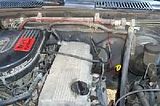
Step 42 – Come off of the AC and heater tubes and wire tie the power wire to the relay harness. 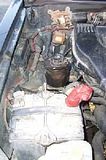
Step 43 – Cut the wire to length to go to the positive battery post. Attach a 30 amp inline fuse. We'll attach it to the post after we finish wiring on the inside.
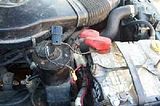
Step 44 – Remove the bottom bolt that holds the fuse block bracket to the door jamb. Install the relay using this bolt to that location.
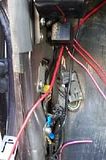
Step 45 – Below that bolt is a ground screw with a ground wire attached to it. Remove the screw and ground the relay to that screw. Ground the window wire harness to that screw. Reinstall the screw.
Step 46 – Remove the stereo fuse from the fuse block and install the Add-A-Circuit in that spot. Put 10 amp fuses in both ports.
Step 47 – Connect the relay trip wire to the Add-A-Circuit wire. This way whenever you turn your key to ACC the windows will have power.
Step 48 – Connect the relay positive wires to the window wire harness positive wires.
Step 49 – Connect the relay main power harness to the positive battery post. Just loosen the terminal, remove it, place the wire against the post and reinstall the terminal.
Step 50 – It's test time!. Put a switch on the passenger door window wire harness and switches on the driver's door window wire harness. Crap! The battery is run down (remember the warning in step 1?) . Find somebody to jump the battery. Try out your windows. If it doesn't work use a tester from the relay main power wire to the relay, from the Add-A-Circuit to the relay on key at ACC, from the relay to the outgoing power and from the outgoing power to the window motors and switches to find the break.
Step 51 – Reinstall the knew kick panel.
Step 52 – Reinstall the two screws that hold the knee kick panel under the steering wheel in place.
Step 53 – Reinstall the cover for the park brake rod if dash mounted.
Step 54 – Reinstall the lower side kick panel as in step 22.
Step 55 – Alright, now to install the door panels and wrap this baby up. Take the switch housing, flip it over and make a mounting template.
Step 56 – Place template on back side of door panel and mark holes for mounting. Angle it a little and it makes a better feel and appearance. Place it so that the top is covering the old window crank hole by 3/8". I matched it to the line melted into the door panel cover. Drill 7/64" holes through the panel and mount the switch covers. Cut the panel board out into the shape of an oval towards the bottom of the switch covers to make room for the switch wires to come through.
Step 57 – Replace all those broken, worn and bent Christmas tree clips in the door panel. Remove the switches from the harness. Reinstall the door panel but don't snap in any clips yet. Feed the switch wire harness connectors into the switch housing and out through the switch mounting holes.
Step 58 – Attach the switches and get all of them functioning in the same manner. I like mine; push down on the back the window rolls down, push down on the front the window goes up. Press the switches down into the switch housings.
Step 59 – Starting at the top of the panel and working from underneath it get the top row of clips aligned and installed.
Step 60 – Feed any excess window switch wire harness back into the door. Reach inside the door and make sure wire routing is out of the way of mechanicals.
Step 61 – Align and install the remaining clips.
Step 62 – Reinstall the door handle surrounds.
Step 63 – Reinstall the door armrests.
Step 64 – Reinstall the door lock pullers.
Step 65 – Have a six pack of beer and celebrate!
